Restore Netscape's native
PNG support (when QuickTime installed)
Viewing/using
Truecolor+alpha PNGs with Paint Sho Pro 7
Viewing
Truecolor+alpha PNGs with IrfanView
:::: Restore Netscape's native PNG support (when QuickTime installed) ::::
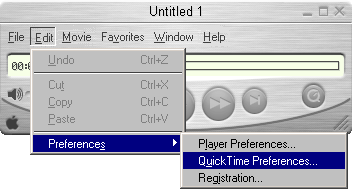
After opening the QT player or viewer, go to the 'Edit' menu
and select 'Preferences...' then 'QuickTime preferences...'
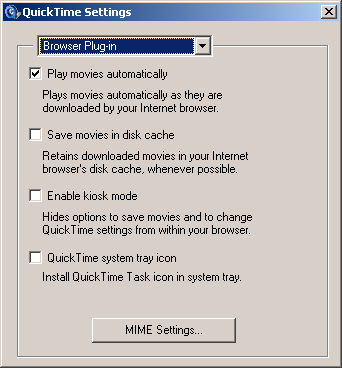
In the 'QuickTime settings' dialog, select 'Browser plugin' into
the list, then click on the 'MIME settings' button
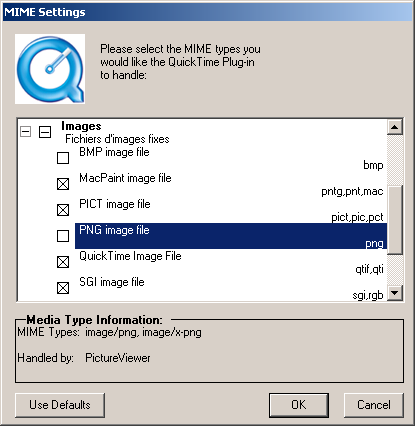
Into the 'MIME settings' dialog, develop the 'Images'
branch, find the 'PNG image file' line, uncheck it and click
OK.
Native PNG support into Netscape is now restored (the bug may affect
MSIE too, if this workaround doesn't work, let me know by mailing me
at sonic-discovery @ fr.st).
:::: How to view and use 32-bit (alpha
transparency) PNGs with Paint Shop Pro 7 ::::
Important note for Paint Shop Pro 8 and 9 users: there is absolutely
no need to perform the manipulation above, as PSP8/9 will automatically load the alpha channel
when opening a Truecolor+alpha PNG (it just behaves like other software such as Photoshop do... finally ^^),
the image will appear as a one-layer transparent one. I don't know if you can export PNGs
the same way however (via 'Save as'). Anyway, this is already a great improvement compared
to older versions.
We all thank Greg2K for this interesting and useful discovery ;).
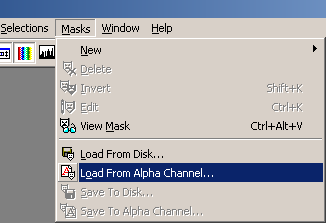
Click on Masks, then Load from Alpha Channel.
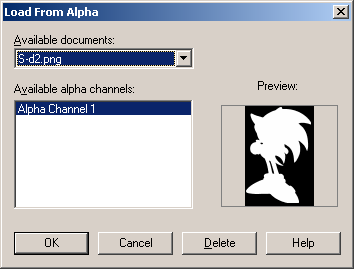
Click OK, and transparency will be restored to the image.
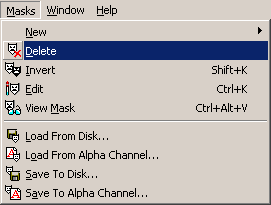
Now, click on Masks, then Delete.
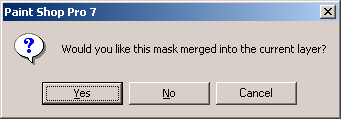
A dialog box appears. Click 'Yes' and transparency will be glued
to the image, avoiding transparency misinterpretations by PSP during
copy-paste operations.
:::: How to view 32-bit (alpha transparency)
PNGs with IrfanView ::::
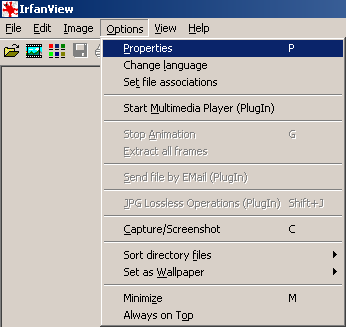
Go to the 'Options' menu and select 'Properties'.
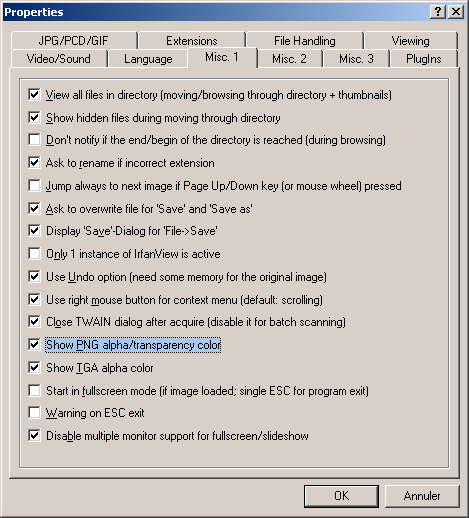
A dialog appears. Select the 'Misc. 1' tab, then the 'Show
PNG alpha/transparency color' option (I highlighted it for convenience
on the screenshot). Check it.
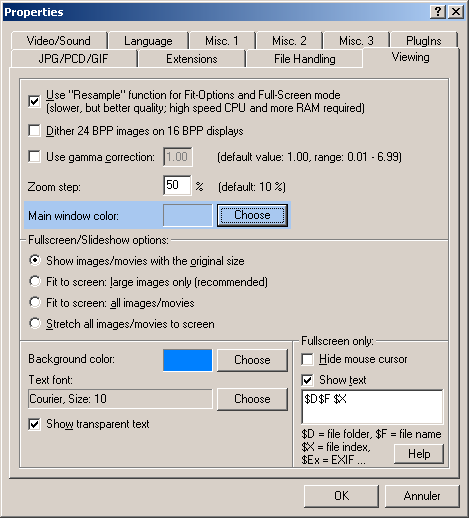
You may want to change your favourite background color which
artworks will be blended on. For that, go to the 'Viewing' tab
this time. Find the 'Main window color' line and click
the Choose button. Pick up your color (white recommended
if you plan to print) into the color picking dialog that appears. Click
OK. Now, click OK on the 'Properties'
dialog, reload your artwork and it should be blended on your favourite
background color.